Blog, Crafts, Monster Monday, Monsters

“The Winter Yeti: A Crafty Creation”

Hello my fellow monster-lovers, I’m excited to share something special with you today. Last week, we were talking about how to get creative with celebrating this holiday season by coming up with new ideas and traditions. To back up a bit, when I was young, my Granny (with Grandad’s help, I’ve been told) began a tradition of making all of us Grandkids a tree ornament every year. They were always unique, beautiful and whimsical and it became something we really looked forward to. My loving, wonderful Grandparents have since passed, so opening my tin of decorations every December brings an especially warm glow of memories to my heart. That’s why I decided to continue the tradition, to honour them and to celebrate the season this year, by making my own Christmas ornament! I would love it if you joined me in making your very own Winter Yeti decoration as well!

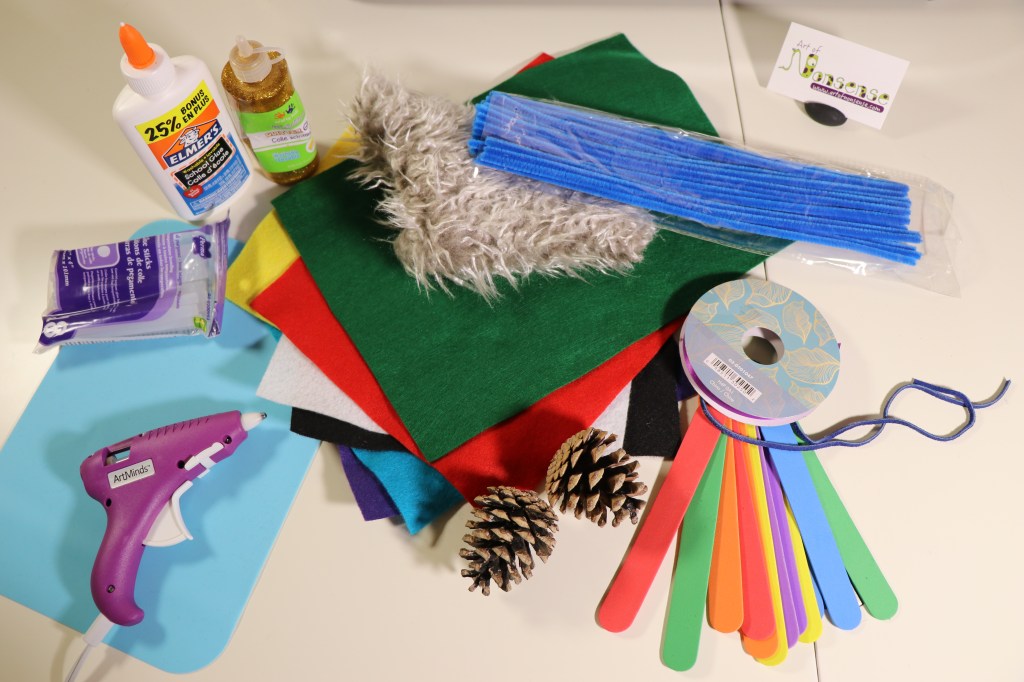
Now, you can be as creative as you like and use whatever you have around to make your unique handmade ornament. By all means make anything you want! It doesn’t even have to be a Yeti, it could be an animal, a snowman, or just a beautiful thingamabob…but to give you some inspiration, here is a list of my supplies (with alternatives in brackets) and the steps I followed to make mine:

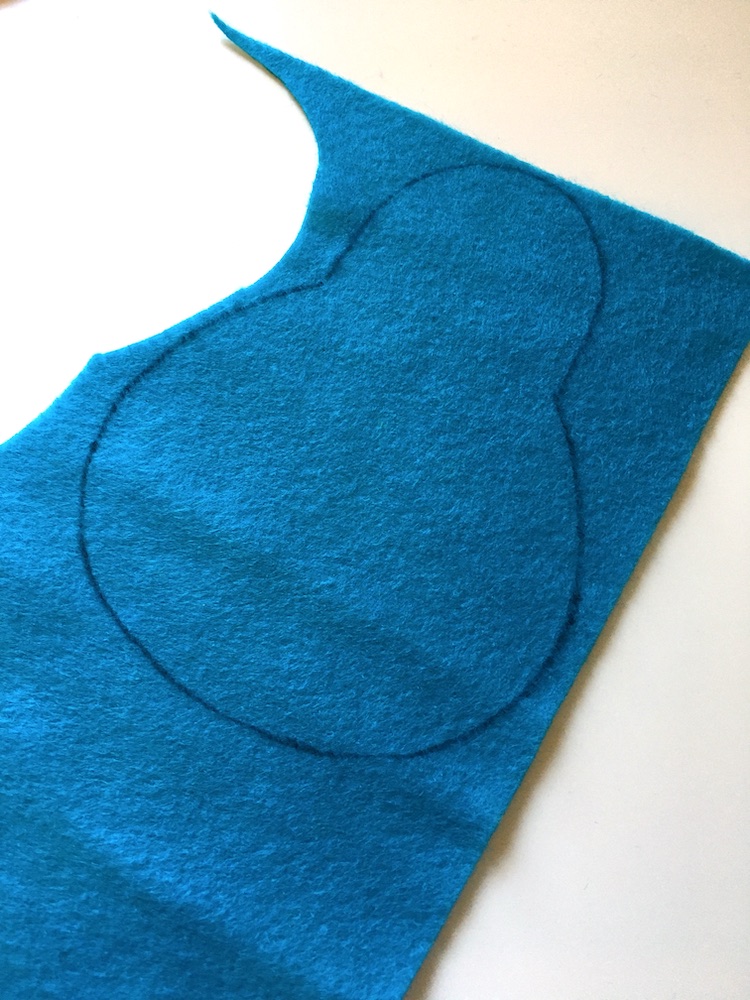
-A dry pinecone (piece of driftwood, stone) for the body

-Assorted felt (craft foam, googly eyes, fabric scraps, cardstock)

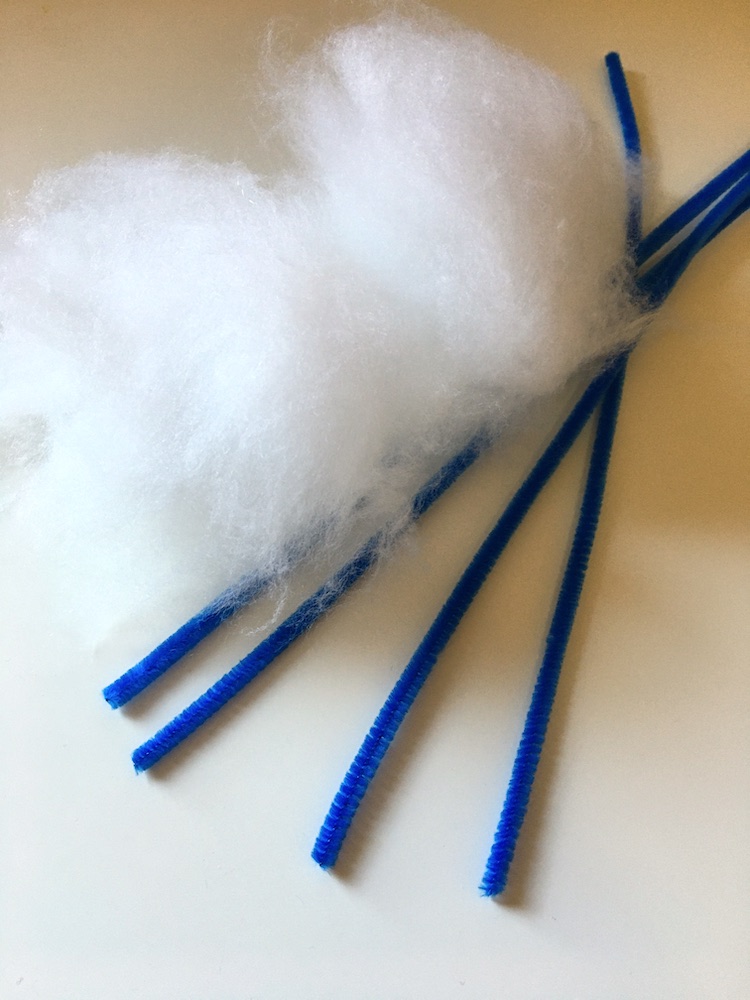
-Fake fur (cotton balls, pom-poms, feathers)

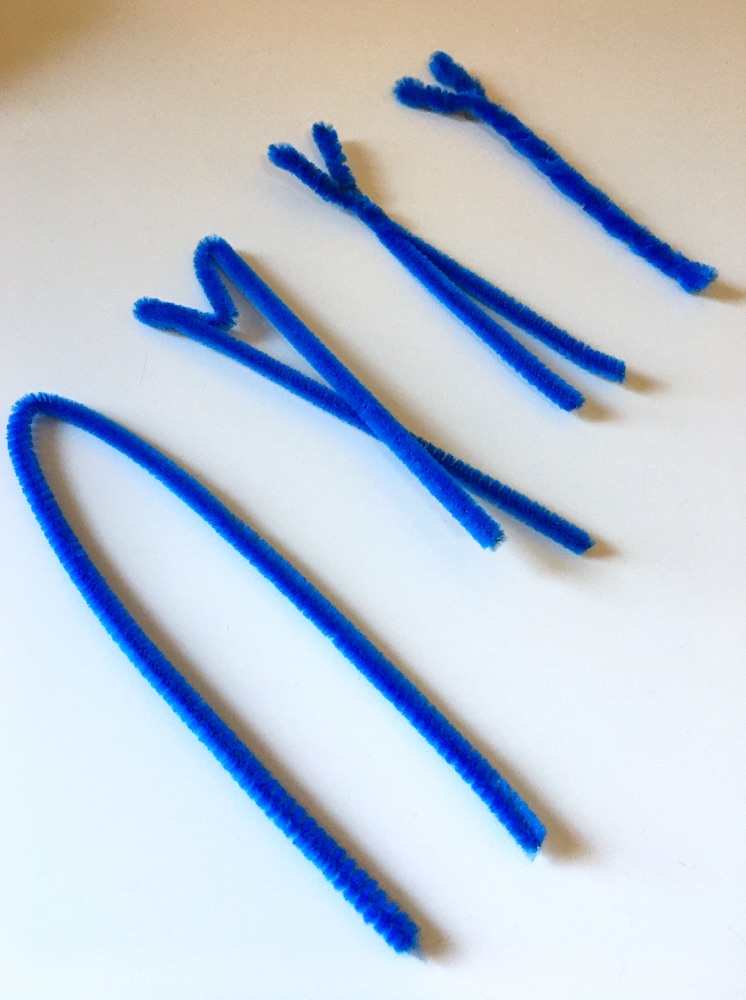
-Faux leather string (pipe-cleaners, ribbon)

-Ribbon (string, twine)

-Glitter glue (sparkles and white glue)

-Any other crafting materials you want to use!

-Hot glue gun and extra glue sticks (white glue)

-Scissors

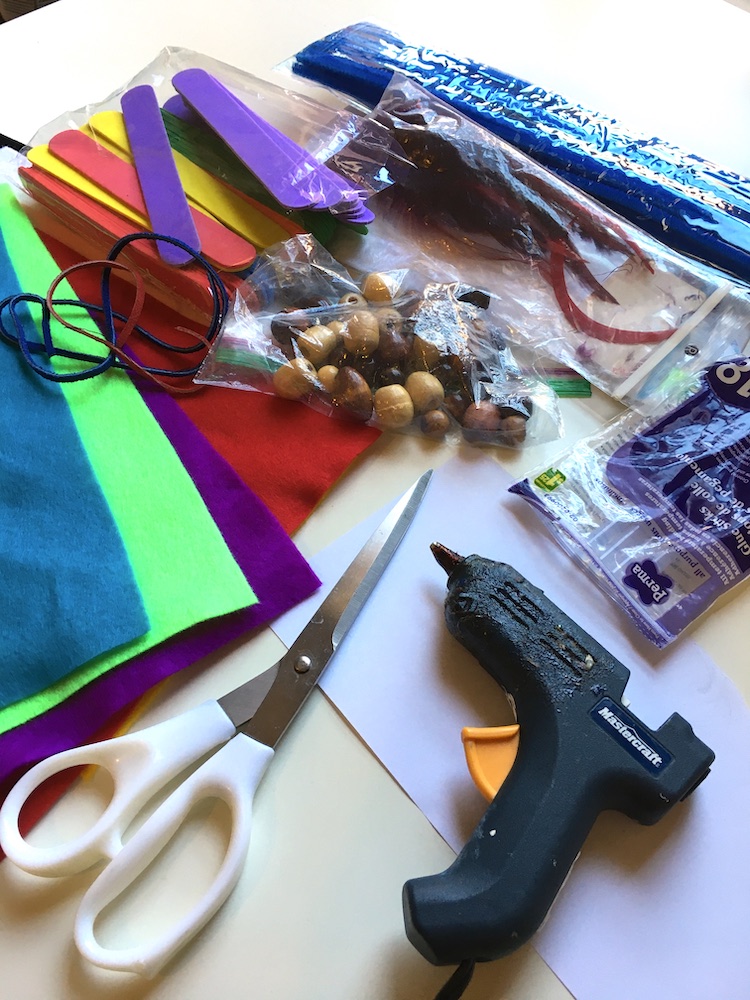
Step 1: Gather Supplies. Get creative and cover your craft table! NOTE: A hot glue gun should only be used by adults. White glue can be used by children, just be patient while it dries!

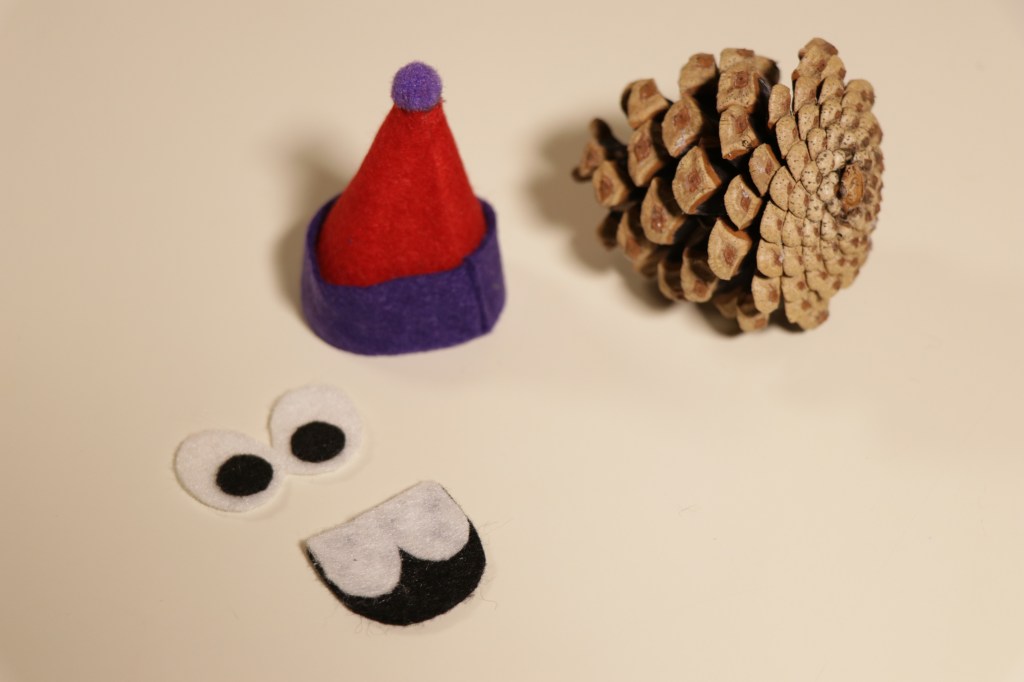
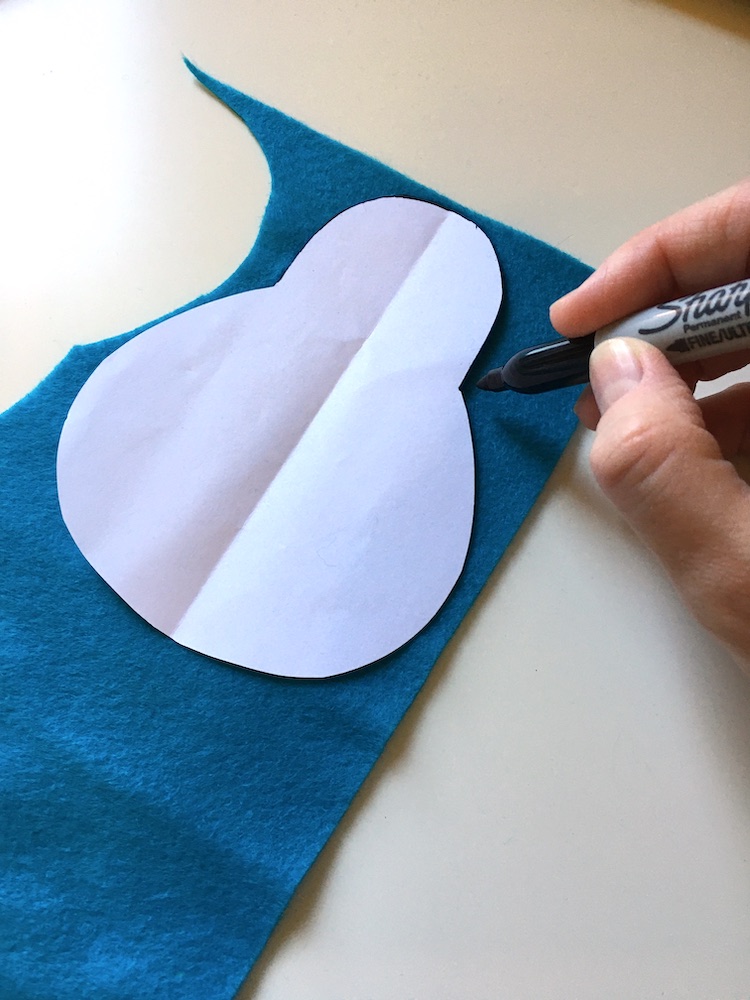
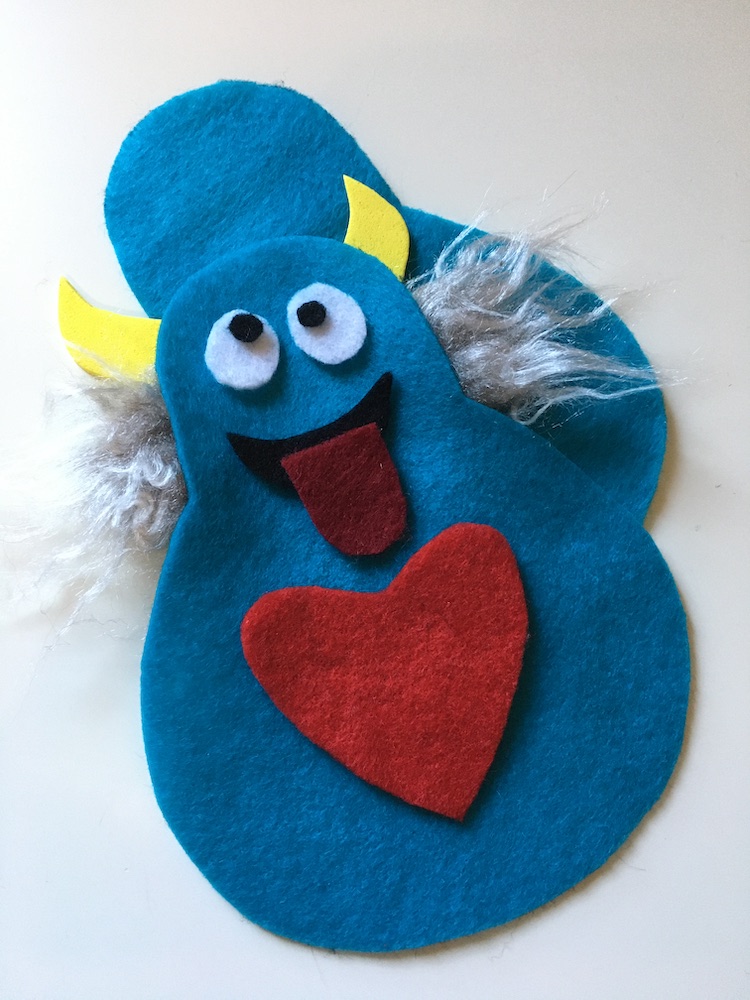
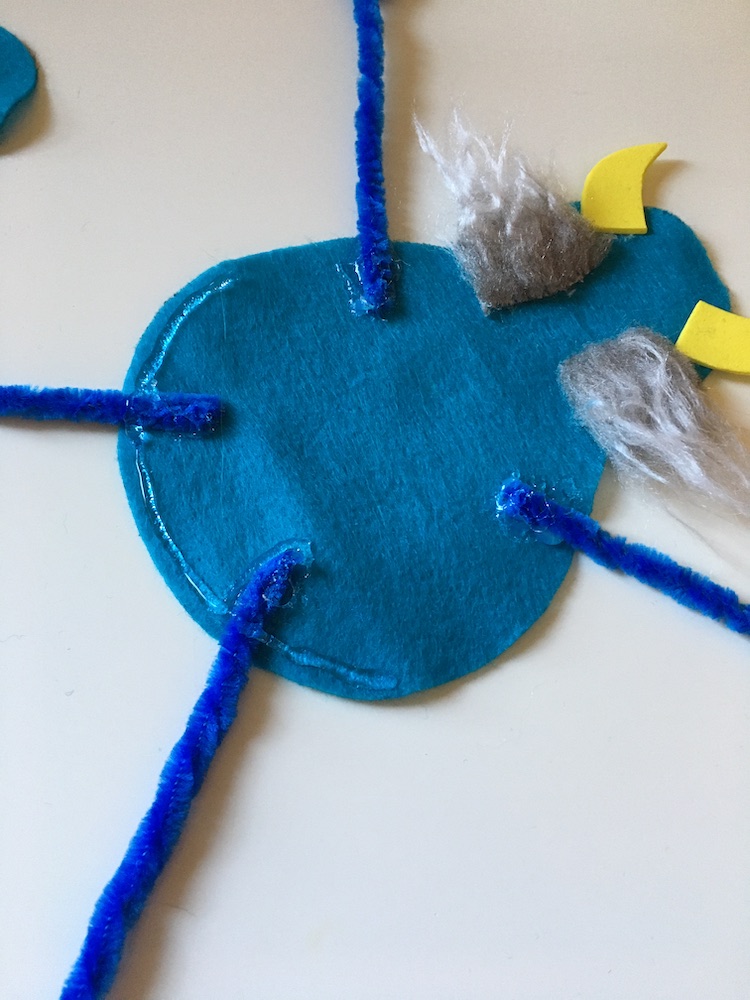
Step 2: Cut Out Details. Use the felt for the eyes, mouth, teeth, and hat. I cut a half-circle for the hat, a long strip for the base, and found a pom-pom for on top. Cut half-oval shapes from the fake fur for the feet and moustache. Cut faux-leather string into two legs, as long as you wish!

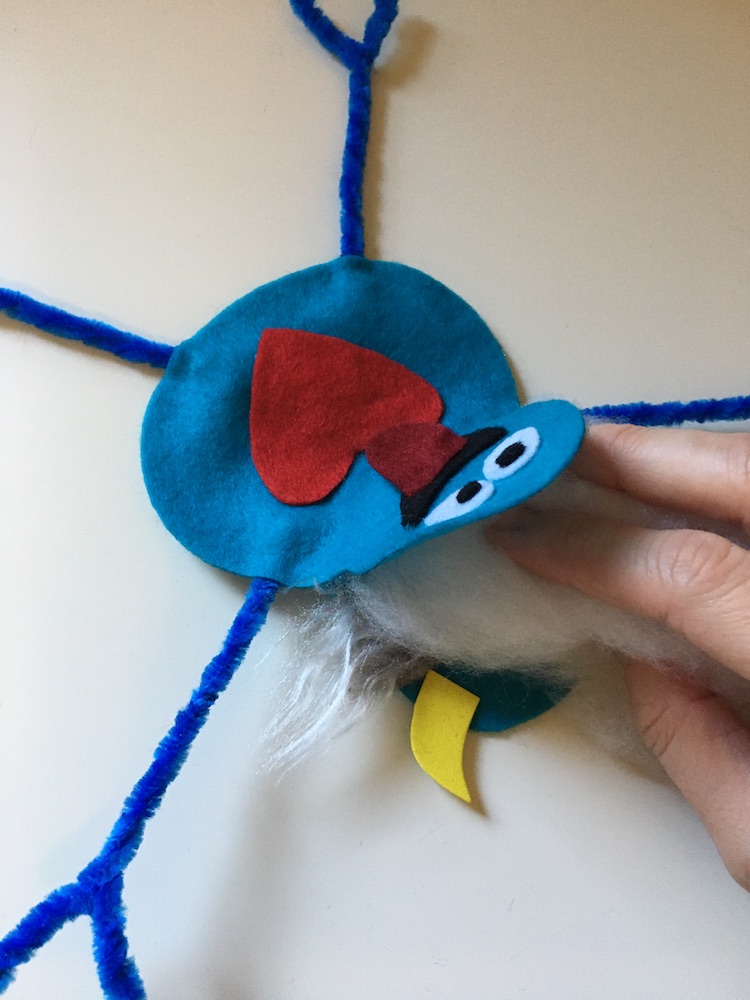
Step 3: Glue Details Together. Glue the pupils onto the eye whites and the teeth onto the mouth. Glue the hat into a cone shape, then add the base and pom-pom.

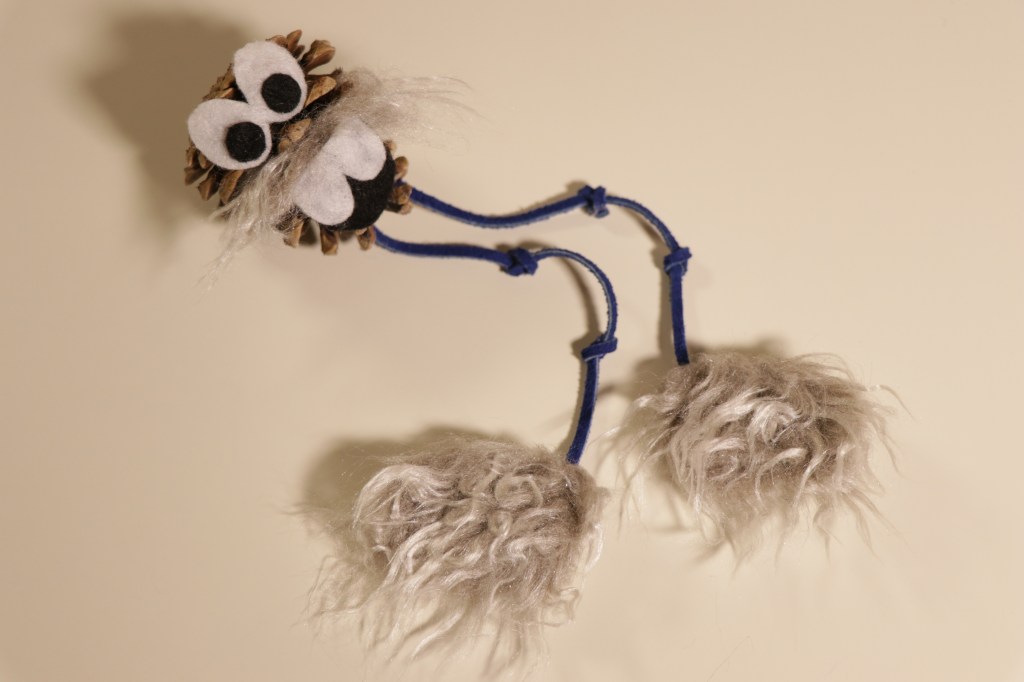
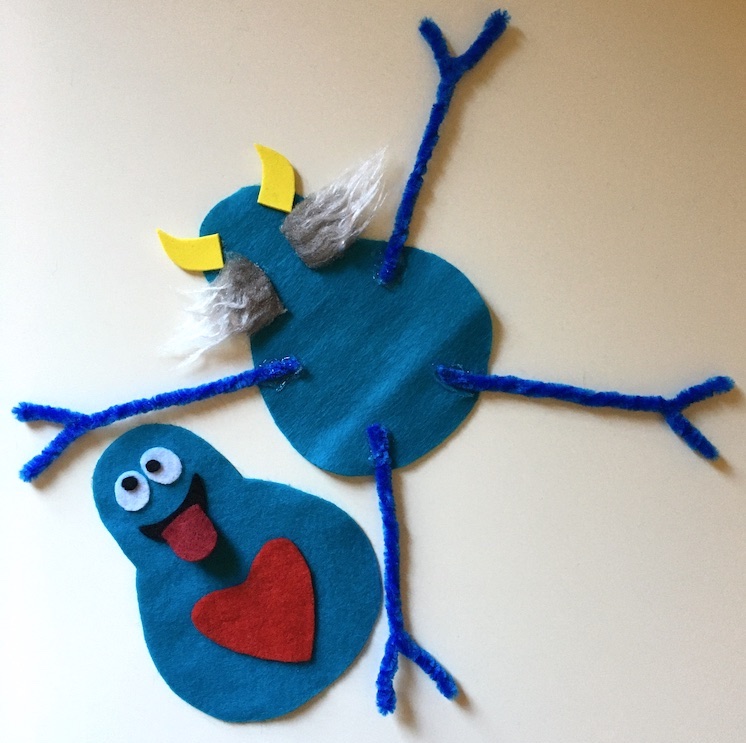
Step 4: Make the Legs. Glue each leather string to the centre, backside of a fur foot, then fold over each foot onto itself, fastened with glue, to make furry feet! Tie a knot or two into the legs for character.

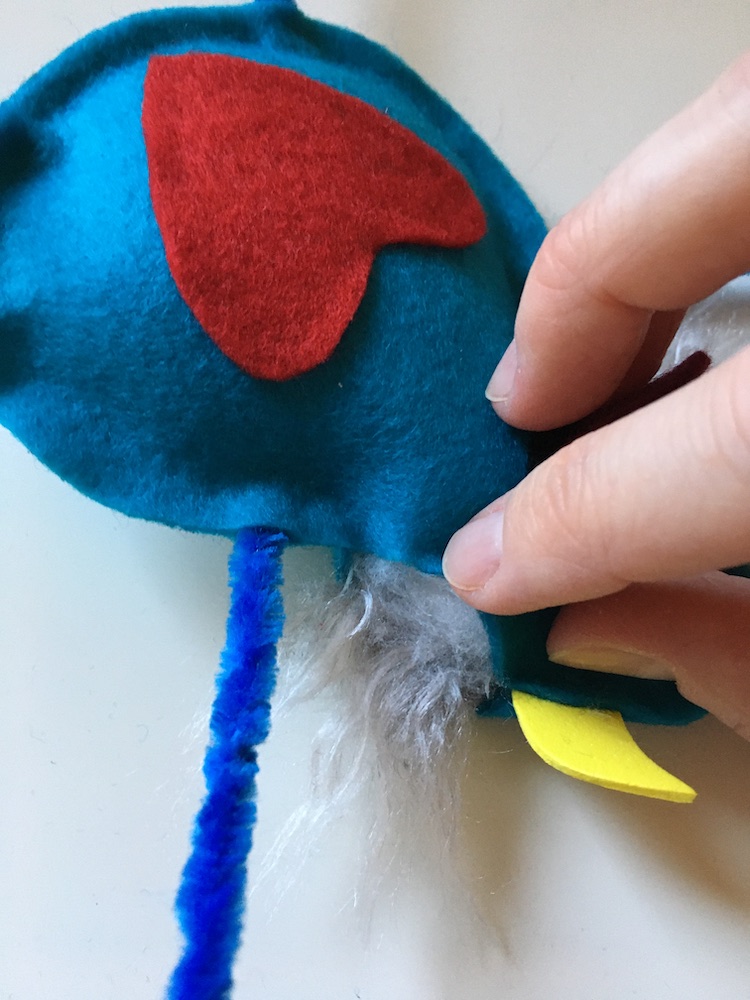
Step 5: Glue Details Onto Body. Glue on the eyes, moustache, mouth, and legs. Hint: Position the eyes above one of the pinecone’s scales (the bumpy parts!) as a nose, using the larger end of the pinecone as the top of the head.

Step 6: Glue on the Hat. Apply glue around the lower edge of the hat and fasten it to the top of the pinecone.

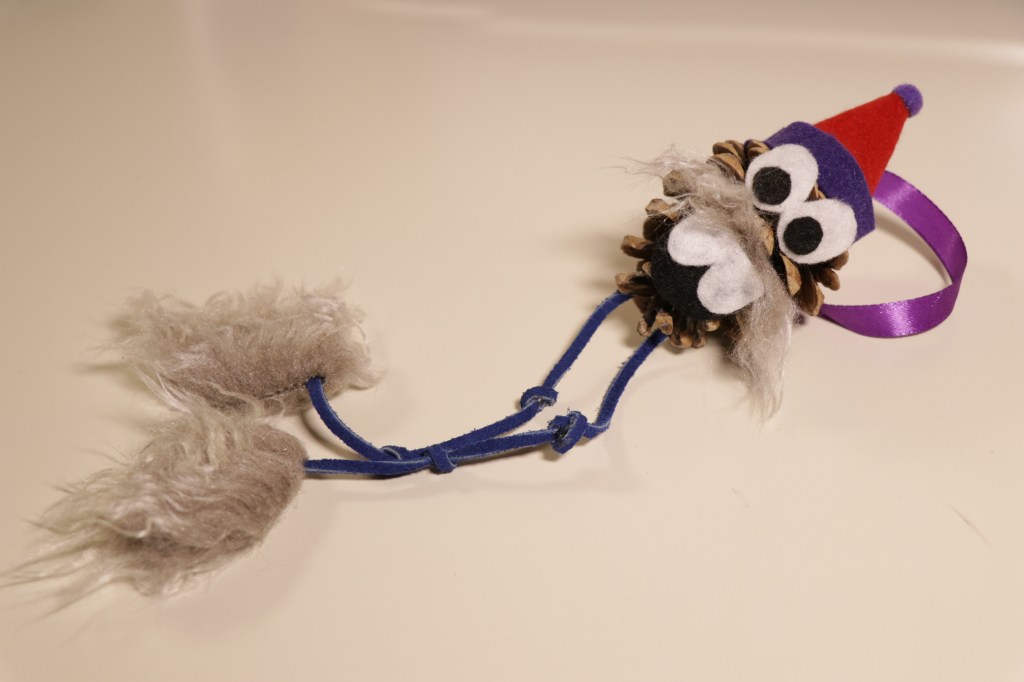
Step 7: Glue on a Ribbon. Cut a 10″ piece of ribbon and knot the two ends together to make a loop. Glue this to the back of the hat. Make sure all the glue has dried completely before moving to Step 8.

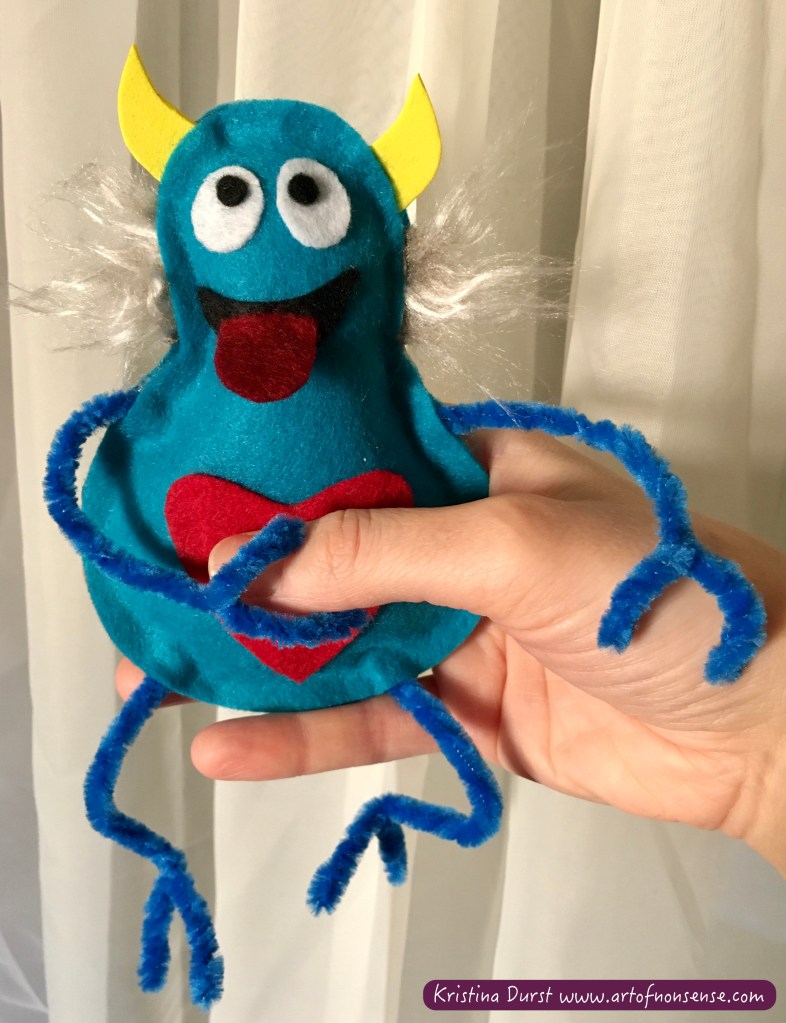
Step 8: Glitter Away! Apply glitter to your Yeti as desired for extra glam and hang to dry! Isn’t it CUTE?! Now your Winter Yeti is ready to make its journey to your tree or other special spot. Make as many Yetis as you would like for yourself, your family and your friends to share the magic of the season!

Winter Yeti Handmade Ornament Craft

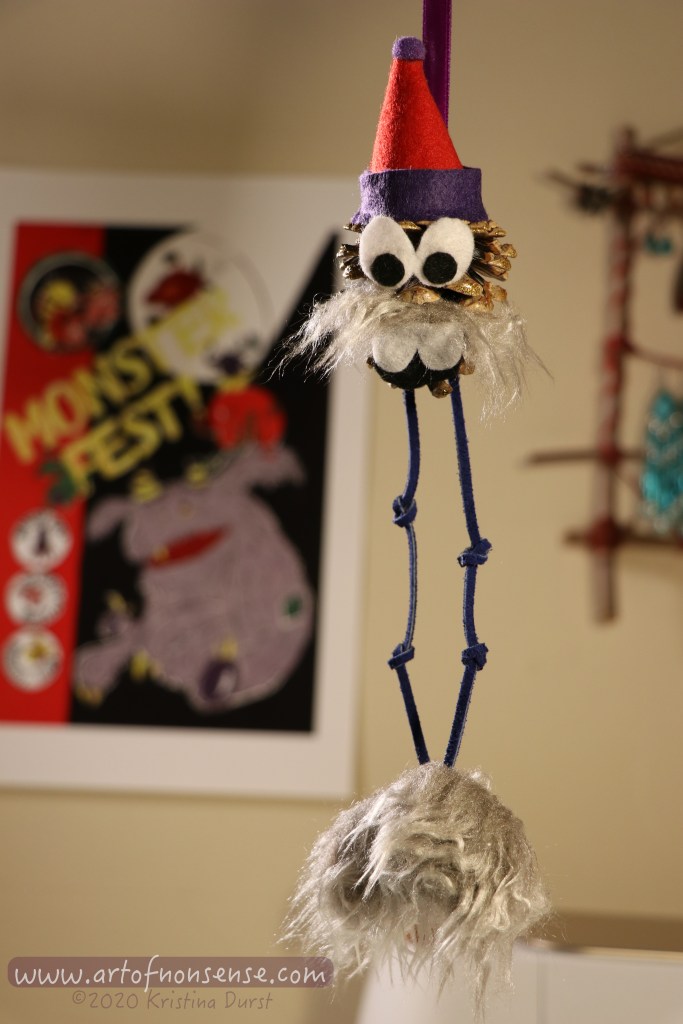
We really hope you enjoy this abominable craft as much as we do and we would love to see your Yetis, ornaments, or other creative projects you came up with this season. So please, share in the comments below!

Happy & Creative Holidays to All!

Thanks for joining! Find us for more monsterly fun @artofnonsense on Facebook and Instagram

Pssst- what I write in this blog is a reflection of my own ideas and experiences and/or interpretations of any referenced material. The content of this blog is for entertainment and/or informational purposes only. I am not an expert or therapist and cannot be held liable for any content provided or how it is used. Please enjoy at your own discretion. I reserve the right to change the content or management of this blog at any time. That said, I hope you enjoy it!  © 2020 Kristina Durst All Rights Reserved.

Blog, Crafts, Monster Monday, Monsters

Gotcha Monster: Free Pattern & Instructions!

As promised, here is the pattern and instructions for last week’s fun craft, the Gotcha Monster!

Supplies:

Felt sheets

Pipe-Cleaners

Craft Stuffing/Cotton/Fabric Scraps

Scissors

Marker

Glue (hot glue gun & glue or white craft glue)*

Optional Supplies for Personalizing Your Monster:

Craft Foam Sheets

Googly Eyes (instead of cutting out your own felt eyes)

Craft Fur

Beads

Ribbons

Feathers

Whatever you want to decorate your Gotcha!

*Note: I used hot glue, which dries quickly as you press your pieces together but hot glue guns should only be used by an adult using caution as they can cause burns! If using white glue, be patient as it dries.

Step 1: Print provided pattern or design your own monster shapes on paper. You can get as creative as you like with shapes and details! What will your Gotcha look like!?

Step 2: Cut out paper pattern pieces and trace them in specified amounts onto felt sheets using a marker. Choose your own colours! You can use craft foam for the horns if you have it, but felt is fine!

Step 3: Cut out all the shapes now drawn on the felt and/or craft foam.

Step 3: Cut Out Your Pieces

Step 4: Use a pipe cleaner to form each of the monster’s arms and legs: fold in half, fold ends over to create a long “M” shape, twist pipe cleaner at fingers/toes and down the arm/leg to create a sturdy limb.

Step 4: Bend Pipe-Cleaners Into Arms & Legs

Step 5: Glue the Belly, Eyes, Pupils, Mouth, then Tongue (glue along the flat, cut edge of the felt to make the tongue stick out!) to the outside of the Front Body. 

Steps 5 & 6: Glueing On the Pieces

Step 6: Glue the Horns, Fur or other optional accessories if any (get creative!), Arms and Legs to the inside of the Back Body— all just a few centimetres in from the edge so that they stick out!

Step 7: Attach the Back and Front Body together by applying glue to the edge of the inside of either Body, a section at a time, leaving a small hole to push the stuffing into. (*If using white glue, let the glue dry at this stage before attempting to stuff the monster.) After filling the body with stuffing/cotton balls/fabric scraps, glue the remaining hole shut and ta-daa! You’ve got yourself a Gotcha!

Step 8: Give your Gotcha a name and have fun! See what your Gotcha can hang onto or what games it might come up with! 

Step 8: A Gotcha is Born- Have Fun!

Happy crafting everyone…I’d love to see a picture of your Gotcha in the comments!

Thanks for stopping by! Also find me @artofnonsense on Facebook, Instagram, and Pinterest

Pssst- what I write in this blog is a reflection of my own ideas and experiences and/or interpretations of any referenced material. The content of this blog is for entertainment and/or informational purposes only. I am not an expert or therapist and cannot be held liable for any content provided or how it is used. Please enjoy at your own discretion. I reserve the right to change the content or management of this blog at any time. That said, I hope you enjoy it!  © 2020 Kristina Durst All Rights Reserved.

Blog, Crafts, Monster Monday, Monsters

The Gotcha Monster: Crafting for the Heart

I’ve got a serious case of the crafties lately— for me crafting is an unleashing of creative energy as well as a peaceful and therapeutic activity. So my logic deduces that crafting is overall good for the heart! Since I’ve been wanting to create some monster crafts for all of you young-at-heart monster huggers out there, it proved to be the perfect day for creating this crafty little cutie. He’s fun and easy to make and can hang out with you wherever you go to serve as a reminder that joy, love, and creativity can be found in any moment. Stay tuned for the upcoming free monster craft pattern and instructions to make your very own Gotcha! In the meantime, don’t forget to create in whatever fun, calming, imaginative, stress-relieving ways call to you… Especially if you’ve found yourself stuck in a mindset of needing to be achieving, succeeding, or otherwise accomplishing materially purposeful activities lately 😉 Set your heart free…let the crafties getcha 😉

The Gotcha Monster, So Huggable
The Gotcha Monster, Just Hangin’ Out
The Gotcha Monster, Helpin’ with Work

Thanks for reading! Follow me @artofnonsense on Facebook, Instagram, and Pinterest

Pssst- what I write in this blog is a reflection of my own ideas and experiences and/or interpretations of any referenced material. The content of this blog is for entertainment and/or informational purposes only. I am not an expert or therapist and cannot be held liable for any content provided or how it is used. Please enjoy at your own discretion. I reserve the right to change the content or management of this blog at any time. That said, I hope you enjoy it!  © 2020 Kristina Durst All Rights Reserved.

art, Blog, Colour-ME, Colouring Page, Crafts, Creative Learning, Monster Monday

“Unexpected Friends: Free Colouring Page!”

Happy Victoria Day Everyone!

I’ve had some interest in colouring pages this past week, and as such, I decided to create a free printable one for you and/or the little ones in your life! After an unexpected friend landed in my nature photoshoot on Friday— resulting in a photo that received more attention than the rest of the shoot’s photos— I knew I had my inspiration. So in the name of summer coming up and new friends to be found all around, I hope you enjoy this free “Colour-Me” page:

DIRECTIONS: Click on the image > Click the “View Full Size Image” button at the bottom right> Select File > Print > Choose landscape > Print. Let me know if you have any issues as it’s my first time sharing a printable on my blog 🙂

If you want to see more of my available work, including a downloadable 10-page colouring book entitled “What’s in a Seed?”,  visit my online SHOP here!

Colour-Me Printable Page

(P.S. Below is the popular photo from my photoshoot for your now-peaked interest!)

My Unexpected Friend

Thanks for reading! Also find me @artofnonsense on Facebook, Instagram, and Pinterest

Pssst- what I write in this blog is a reflection of my own ideas and experiences and/or interpretations of any referenced material. The content of this blog is for entertainment and/or informational purposes only. I am not an expert or therapist and cannot be held liable for any content provided or how it is used. Please enjoy at your own discretion. I reserve the right to change the content or management of this blog at any time. That said, I hope you enjoy it!  © 2020 Kristina Durst All Rights Reserved.